Treading Lightly
Treading Lightly

Applesauce cranberry muffins

After the mess of trying to get moist cupcakes out of the silicon baking cups, I decided I wanted to try a sturdy muffin to see how it would work. I ultimately decided on this recipe because it looked good and I had all the ingredients. Another major bonus is that they are incredibly quick and easy. Although they turned out well, there are a few changes I would make them to in the future to make them more flavorful.

Ingredients:

2 cups whole wheat flour
1 tablespoon baking powder
1/2 teaspoon salt
1 teaspoon cinnamon
1/4 teaspoon nutmeg
1 egg white
1 egg
1/2 cup soy milk or milk
2 tablespoons vegetable oil
1/3 cup packed brown sugar
3/4 cup applesauce
1/2 cup dried cranberries

1. Preheat oven to 400 F
2. Prep your muffin tins (I used my silicon baking cups)
3. In a large bowl, sift together the flour, baking powder, salt, cinnamon, and nutmeg. (I just whisk it together).
4. In another bowl or mixer beat together the whole egg with the egg white.
5. then stir in the soy milk, oil, brown sugar, and applesauce.

6. Fold the wet ingredients into the flour mixtur until just combines

7. Fold in cranberries.

8. Fill muffin tins. The entire recipe makes 12 muffins.

9. Bake for 20-25 minutes, or until a toothpick comes out clean and dry.
10. Cool in the tin for 5 minutes before removing them.
11. I brushed on some melted butter and sprinkled a cinnamon sugar mixture on top because they were not as flavorful as I had hoped.

As for the fate of the silicon baking cups, I now love them. The muffins practically fell out of them. I really think the problem last time was that the cupcake mixture was incredibly too moist. Next time I will try to find the middle ground for a moist cupcake that is easy to remove from the baking cups.
The next time I make these I am going to add some cardamom, all spice, more cinnamon, more nutmeg, and more cranberries. I am also going to add a little touch of something to top (whether the cinnamon sugar again or large sugar crystals).
Recipe adapted from Moosewood Restaurant Low-Fat Favorites

Moist chocolate cupcakes with a touch of sustainability

I feel like I just need to get this out so we can move on — I’m not a big fan of chocolate.

With that said, I really like these cupcakes. They are incredibly chocolaty, moist, and light (I find really dense cupcakes disappointing, so the airiness of these is one of the reasons why I like them.)

Ingredients (cupcakes):
2 cups sugar (preferably organic and fair trade)
1 and 3/4 cups all purpose flour
3/4 cup fair trade, organic cocoa
1 and 1/2 teaspoons baking powder
1 and 1/2 teaspoons baking soda
1 teaspoon salt
2 eggs
1 cup milk (I used soy)
1/2 cup vegetable oil
2 teaspoons vanilla extract
1 cup boiling water

To make the cupcakes more sustainable, I used silicon reusable baking cups instead of paper liners. In theory this was a great idea; however, the cupcake batter is very very moist, and it really stuck to the silicon cups. I would recommend using the cups for more dense cupcakes and muffins. With that said they did come out, it was just difficult and some did not look as nice as others. (My hands were too messy to show you the true carnage I created while trying to get some of them out. Lets just say some needed some more frosting to hold them together than others.)


Recipe:
1. Heat oven to 350 F. Prepare cupcake pans.

2. Stir together sugar, flour, cocoa, baking powder, baking soda, and salt in a large bowl (or with your mixer).

3. Add eggs, milk, oil, and vanilla. Beat on medium speed of mixer for 2 minutes.

4. Stir in boiling water. (Word of caution, the batter is incredibly runny. By runny I mean it seems as thin as water. I used a measuring cup to pour the batter into the cups. Not to fear, however, they will turn out.)


I filled the measuring cup to the top and tried to fill the silicon cups about 1/2 – 2/3 of the way full.
 I also made mini-cupcakes because I only had 24 silicon baking cups and people at my work (where I brought these treats) are weird about diets and what they eat. I figured if I brought little ones people would be more likely to not rip pieces off cupcakes and leave the rest for some other poor soul willing to eat their leftovers. They are also fun when you just want a quick bite instead of a huge cupcake.

5. Bake large (regular) cupcakes for 22-25 minutes, or until a toothpick comes out clean (some crumbs are ok, but no liquid). Bake mini-cupcakes 11-15 minutes, or until a toothpick comes out clean.

Frosting Ingredients:
1/2 cup (1 stick butter)
2/3 cup cocoa
3 cups powdered sugar
1/2 cup milk (or non-dairy replacement)
1 teaspoon vanilla extract


1. Melt butter.

2. Stir in cocoa.
3. Alternately add powdered sugar and milk, beating to spreading consistency.
4. Frost!

Sorry about the poor picture quality. I don’t know if I was on a sugar high or what, but this picture is horrible. Cupcakes were yummy though.

Recipe courtesy of Hershey’s.

Clean 15: Fruits and vegetables with the least pesticides

After looking over the dirty dozen, this list should help make it easier to shop for foods that are safer for your health and the environment, especially if you cannot afford to eat only organic fruits and vegetables. The clean 15 are the 15 fruits and vegetables that are the most likely to have the least amount of pesticide residue.

1. Onions
2. Sweet corn
3. Pineapples
4. Avocado
5. Asparagus
6. Sweet peas
7. Mangoes
8. Eggplant
9. Cantaloupe
10. Kiwi
11. Cabbage
12. Watermelon
13. Sweet potatoes
14. Grapefruit
15. Mushrooms

Black Bean Chilaquile (Mexican-style casserole)

For some reason I am relatively comfortable in the kitchen if I am baking, but as soon as I have to cook it is suddenly terrifying. I never know how to cut anything or know when things are done cooking. The entire adventure is usually stressful and upsetting.
But not with this black bean chilaquile casserole. It is full of color and flavor while still being easy low key and easy to make (I didn’t have to go running for help once).
Ingredients:
1 cup chopped onion
1 tablespoon olive oil
1 cup chopped tomato (canned or fresh)
1 1/2 cups fresh corn or frozen
2 tablespoons fresh lime juice
1 teaspoon salt
1/2 teaspoon ground black pepper
14 ounce can of black beans
2 cups rinsed stemmed and chopped swiss chard or 2 cups spinach (I really like the swiss chard)
2 cups crushed baked tortilla chips (any kind of tortilla chip works, the recipe calls for baked because its supposed to be a low calorie dish)
8 ounces grated sharp cheddar cheese
2 cups prepared mexican-style salsa
Serves 4-6
Recipe from Moosewood Restaurant Low-Fat Favorites, or at Food.com (the calorie counter on food.com is way off according to the cookbook. If you use the ingredients called for in the cookbook and you make 4-6 servings out of the 8×8 pan (my family makes it into 6-8 servings) it should be 245 calories per serving.)
1. Preheat oven to 350°F
2. Crush tortilla chips and put half of them in the bottom of the 8×8 pan

3. Sauté (on medium heat) the onion in olive oil for 5-8 minutes, until translucent


4. Add in swiss chard or spinach, cook until they begin to turn a darker green and have shrunk down (about 3-5 minutes depending).

5. Add in tomatoes, corn, lime juice, black beans, salt and pepper. Continue to sauté for 5-10 minutes (until all of your ingredients are heated through)

6. Put the sauté vegetables onto the tortilla chip layer

7. Cover the veggies with half of the salsa. Add about 2/3 of the cheese.8. Put the rest of the tortilla chips on. Cover with the rest of the salsa and cheese.

9. Bake 35-40 minutes, until the cheese is bubbling and beginning to brown
I know this doesn’t look like much, but the flavor is amazing.

Homemade Iced Tea

I have a tea obsession. I usually keep it well hidden, but anyone who visits me knows the truth. This past year in my dorm room I had an entire drawer devoted to tea… and that was not even all of the teas I own. I love all teas — black, red, white, and herbal alike. The tea I drink depends on the day and my mood. The problem is that as the weather warms up, drinking warm tea can be slightly irritating. At school and other places I have bought iced tea, but it seems to always come with excess packaging and it’s either too sweet or not sweet enough. Now that I have learned how to make iced tea I can have the exact flavor and sweetness that I want when I want it… It’s a beautiful thing.

Ingredients:
6 (or as many as you want to make) cups of water
6 tea bags (1 bag for each cup of water if you are making more than 6 cups)
sugar to taste (for me it was about 7-8 tea spoons (6 of the “teaspoon” we have in our sugar bowl. I like one per cup of tea))

1. Measure out your water with a little extra to allow some to boil off

2. Pour into a medium sized saucepan and wait until it boils

3. Turn off the heat and add your teabags (1 per cup of water)

I don’t know why, but I love fruity iced teas. I decided to do a herbal peach because earlier this week I made a black peach tea.
4. Once the tea has seeped for the time called for on the box/tin (typically between 3-6 minutes) remove all of the tea bags
5. Sweeten to taste (or not at all) while it is still hot so the sugar melts and mixes in well.
6. When it is all done I pour it into a pitcher. When I travel with my iced tea I use my beautiful glass LifeFactory bottle because it is dishwasher safe (and thus super easy to get completely clean before pouring in my next tea). You can also store the tea in individual bottles, jars, ect.

Four ingredient shortbread cookies

My friend Lauren and I also made these cookies because they are easy to customize to your taste. I love filling them with jam, but you can also add a simple icing or chocolate drizzle or coat. A real bonus of this recipe is how easy it is. It only takes four ingredients to make the dough, and yet you can create multiple types of cookies with it. During the holidays my mom chops up dried fruit and puts it into half of the dough. She finishes those cookies with a simple icing. You can also make them out of whole wheat flour and they taste just as good.

Ingredients:
3/4 pound butter (salted or unsalted) at room temperature
1 cup granulated sugar
1 teaspoon pure vanilla extract
3 and 1/2 cups all purpose flour
optional: fruit jam or preserve, chocolate, powdered sugar (depending on how you wish to finish them once they are baked)


Recipe from The Barefoot Contessa, by Ina Garten- “Linzer Cookies”

1. Preheat the oven
2. In an electric mixer with a paddle attachment, mix together butter and sugar
3. Add the vanilla
4. Add flour and salt
5. Mix the dough until it just begins to hold together. Pull it out of the mixer and shape it into a flat disk.
6. Put it in a container (or do whatever you wish to keep it air tight) and chill for at least 30 minutes. (If you do not chill the dough it will be next to impossible to cut it out.)
7. Roll out the dough about 1/4 inch thick and use cookie cutters for desired shapes
8. Place the cookies on the baking sheet into the fridge for at least 15 minutes. This stops the cookies from spreading out as much.
9. Bake for 20 to 25 minutes, or until the edges are golden brown.


Sorry about the really terrible pictures with these. I had smudged the lens and the lightening was weird when we finally finished all of our cookies. We baked for more than 3 hours. I don’t know about Lauren, but I think it was worth it.

Grocery shopping nightmare: The battle with packaging

Sometimes I feel like my largest tests of will (other than when I am making a dessert and I would rather keep eating it than finish baking it) is when I am grocery shopping. It’s not because I only want to buy items that are terrible for me or I am counting calories, but rather that every item I want (because most of our fruits and vegetables comes from a local delivery service or the farmers market) comes in endless amounts of packaging.

Normally I hate naming the places I am talking about, but this time for clarity I will. Stores like Trader Joe’s and Whole Foods irk me with their packaging. I love trail mix, crackers, and other snacks, and yet they all come in at least a plastic bag and sometimes even a box. The frozen food is in a plastic container, wrapped in plastic, in a cardboard box. Are they serious? There is no point to this piles and piles of packaging. As soon as the item is gone, or moved into a reusable container, the entire thing is meant to just be thrown out. We even put fresh fruits and vegetables in Styrofoam and then wrap it in plastic. Why are we paying to full our garbage cans and our already over flowing landfills?

When I am walking down the isles and I see something I would like to eat I always ask myself how much packaging it has, how much is recyclable, could I do without it? More often than not I walk away from some food item that I would enjoy because of the packaging. I am not willing to take home healthy food (or otherwise : ) ) that is going to send plastic to the landfill. However, it makes shopping for food so frustrating.

When I shop at Whole Foods I can get things in bulk with my canvas bags, but I worry about cleanliness, and sometimes the selection is not that great. I just wish packaging were better sourced, or not used at all. What if we all used reusable containers and brought in what we wanted? What if we didn’t double or triple package things? What if our food was not sealed in plastic? What if all stores didn’t package food?

Today GOOD highlighted a grocery store, In.gredients in Austin Texas that promises to be the nation’s first “package-free, zero waste grocery store.” According to the article:

“The idea is so simple, it’s surprising that no one in the United States has implemented it yet. (The United Kingdom, on the other hand, got the bulk food-only Unpackaged in London last year). Just like many people bring tote bags to the grocery store, shoppers at In.gredients will be encouraged to bring their own containers to pack up items like grains, oils, and dairy. If a shopper doesn’t have his own containers, the store will provide compostable ones. It’s as if the specialty bulk food section rebelled and took over the rest of a traditional grocery store. In.gredients will replace unhealthy, over-packaged junk with local, organic, and natural foods, and moonlight as a community center with cooking classes, gardening workshops, and art shows on the side.
“Truth be told, what’s normal in the grocery business isn’t healthy for consumers or the  environment,” In.gredients co-founder Christian Lane said in a press release. Americans add 570 million pounds of food packaging to their landfills each day, while pre-packaged foods force consumers to buy more than they need, stuffing their bellies and their trash bins: 27 percent of food brought into U.S. kitchens ends up getting tossed out.

I hope they get the funding they need to open and the support to stay open. I also hope we can get one close to my home in the Bay Area. While we wait there are some easy things you can do to cut down on the packaging you send to the landfill:

1. Avoid all of the isles that do not have fresh food. Focus on your fruits, vegetables, and freshly baked goods.

2. Shop at farmers markets and bring your own containers and totes. Give back any baskets or bags after putting your food into your own containers.

Image courtesy of Greener Greener
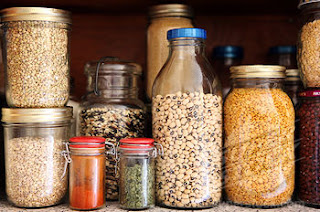
3. Shop at the bulk bins with canvas bags or jars. Just do not forget to keep one empty for the clerk to weigh.
Image courtesy of Eating Bird Food
Image courtesy of Super Stock
4. If you have to buy something packaged, buy the biggest package you can to reduce the amount of packaging you can.

Until one of these stores makes it near me, I will continue to battle the packaged foods and stalk the bulk bins for the trail mix with the perfect ratio of dried fruit to nuts and other tasty snacks.

Rich and light Zebra Cookies

My friend Lauren and I decided to make something simple, but fun for Father’s day. We decided to make chocolate zebra cookies that are rich and soft like brownies. These cookies are great because they are made in one saucepan, meaning there are few dishes to wash when you are done.
Ingredients:
4 ounces unsweetened chocolate, cut up
3 eggs, beaten
1 and 1/2 cups sugar
1/2 cup cooking oil
2 teaspoons baking powder
2 teaspoons vanilla
2 cups all purpose flour
Makes about 48 small cookies.
Before I get started I have to apologize for the smudge in all of the pictures. I apparently touched the lens with greasy fingers before we got started…
To begin, chop the chocolate thinly and evenly to help it melt quickly and easily. Lauren and I shaved the chocolate so it would melt quickly.

Once the chocolate melts, remove the pan from the heat and stir in the eggs, sugar, oil, baking powder, and vanilla. (You have to remove it and let it cool down a bit so it will not cook your eggs).

Next add the flour and stir until it is completely combined (a quick warning, the dough is thick and heavy, so this last step takes some energy).
Once combined, chill the cookies for 2 hours or until easily handled.
Use a spoon or scooper to make even sized balls (about 1 and 1/4 inch). Roll the dough in your hands to get a round ball, and then roll them through powdered sugar before placing on a baking sheet.
Bake in 375 degree oven for 8-10 minutes or until the edges are slightly firm and the top has cracked. Cool on a wire rack.
Recipe courtesy of Christmas Cookies, 1994.