Treading Lightly
Treading Lightly

Healthy Oatmeal Cookies (with chocolate chips and dried fruit)

First off, lets be clear: a cookie is a cookie. However, as far as ingredients go, these are healthier than many other options. These oatmeal cookies are made with whole wheat flour, oats, and dried fruit which not only taste great, but also add fiber. These cookies would also be hearty enough to do well with additions like flaxseed.

Ingredients:
1/2 pound (2 sticks) butter (or substitute to make vegan)
1 cup firmly packed brown sugar
1/2 granulated sugar
2 eggs
1 teaspoon vanilla
1 & 1/2 cups whole wheat flour
1 teaspoon baking soda
2 teaspoons cinnamon
1 teaspoon cardamom
1/2 teaspoon freshly grated whole nutmeg
1/2 teaspoon salt
3 cups oats (slow cook, not instant)
A 12 oz bag of chocolate chips (any kind you like. I used milk chocolate.)
1 cup dried fruit of your choice (if you want apricots or another larger fruit be sure to chop it into small pieces first.)

Makes 48 cookies

Recipe:
1. Preheat oven to 350 F
2. Beat together butter and sugars until creamy

3. Add eggs and vanilla; beat well
4. Add combined flour, backing soda, spices, and salt; mix well

5. Stir in oats, chocolate chips, and dried fruit; mix well. Don’t forget to scrape down the sides every once in a while

6. Drop rounded tablespoonfuls onto cookie sheet

7. Bake 9-12 minutes depending on oven and personal taste. I like mine chewy, so I take them out when they are just slightly golden brown along the edges and parts of the top.

8. Let sit 1 minute on the cookie sheet; remove to wire rack
The cookies are really loose when you first take them off the sheet. Do not worry, you cooked them long enough. As they cool they bind together better and will no longer fall apart if you even look at them funny.

If you only want a few cookies, this recipe freezes really well. Just scoop out the dough into tablespoon size pieces before placing in a freezer safe container. I recommend layering the dough and using a piece of parchment or wax paper to keep them from sticking. The dough is also tasty straight out of the freezer : )

Electronic Waste

As college students are packing up to leave, piles of e-waste are growing larger and larger, especially at SCU. E-waste is one of those things that most people do not think about. Typically people toss it into the trashcan and it ends up in a landfill, or they take it to a recycling center and believe that it will be taken care of responsibly.

Do you know where your e-waste is going? 70 percent of computers in the U.S. end up in landfills. Of the 30 percent that are “recycled,” 50-80 percent end up exported to other countries, including India, China, and Ghana. (According to the Silicon Valley Toxics Coalition).

Have you ever considered how many products you have that will become e-waste? Every single item that runs on electricity (either plugs into an electrical outlet or runs on a battery) becomes e-waste when you dispose of it. This includes computers, televisions, cameras, cell phones, iPods, remote controls, headphones, gaming consoles, watches, blenders, and countless other devices.

Electronic waste is the fastest growing municipal waste as well as one of the most dangerous because of the toxic materials inside of them. These materials are not only harmful to communities near landfills where some of the electronics end up, but also the communities around the world where the e-waste is exported and primitively “recycled.”

After considering the amount of e-waste you inevitably create I encourage you to consider all of the electronics you own. Decide if all of the electronic items you own are necessary, or if you could live without them. If something breaks, do not only research a responsible recycling facility that will protect its workers and not export the materials, but also question if you really need to replace it. Treat your items well and make sure they last as long as possible.

Consider getting something fixed before you completely replace it. Just because your cell phone contract allows you to get a new phone every year or every two years does not mean that you have to. Resist the temptation to buy the latest and greatest things when the items you have still work well. If you are looking for a responsible recycler near you check out SVTC or e-stewards recyclers.

Moving out

As the last few weeks of school are coming to an end I am starting to face the inevitable. I have to pack.

I do not know how it happens. Somehow between the time I moved in and now all of my things have multiplied. I did not notice how much more stuff I have since the last time I had to pack it all up in September.

As my roommate and I stared at all of our stuff last night wondering how we were ever going to fit it all in our cars or storage, I began to realize that this is a common problem. I know not everyone is moving out right now, but as college students across the country stare at all of their belongings in fear of packing them, I thought maybe we could all use a little advice so none of us end up like this:

Photo courtesy of Molly

Ways to pack with less stress:

1. Start by asking yourself if you still need the item. If you do not, you can donate or sell the item (which means less to put into boxes and carry, yay!).

2. Pack a section or a few things at a time. It’s easy to get burned out when packing. If you know when you have to move out, you can plan ahead and just pack a section a day at a time. I find that when I do this my stuff is better organized, I am able to fit more into the limited space in my car as well as the boxes. I also remember where things are better a few months later when I’m moving in again.

3. Label boxes and items. I know it seems unnecessary at the time, but when you are loading up the car it’s nice to know exactly what’s in the box so it can be safely packed. It also makes unpacking a great deal easier.

4. For college students, open your door and talk to people while you pack. One of the nice things about dorms is that everyone is going through the same things you are. I had a great time moving out with everyone on my floor last year, and it’s a nice way to have one last time together before everyone leaves for the summer.

5. Plan ahead. No matter what else you do, if you keep when you need to be packed by in mind and you don’t leave everything for last minute, you will be less stressed and your packing and unpacking will be much smoother.

Tips to decreasing waste when moving:

College campuses are especially notorious for creating enormous amounts of waste when students move out. Carpets, furniture, and other items are just tossed into dumpsters so they do not have to be moved.

If you are a college student, or anyone else, who just cannot take an item with them even though it’s still in good condition, donate or sell it. Many places will pick up the item, or you can drop it off before you have packed your car.

For Santa Clara students, every dorm will have a location to drop off small and large items to donate, e-waste, used carpets, and things that actually need to go to the trash. The carpets, depending on what shape they are in, are recycled or reused. This diverts a great deal of unnecessary waste from landfills. For more information about where these services are located near your dorm, go here.

Before you move, (college students and everyone else) check out the services available to you to be sure that you can recycle and reuse as many things as possible.

My eco-friendly sunscreen picks

No one knows sunscreen better than a lifeguard. I have spent the last four summers trying to not get completely fried in the sun. All of the eco-friendly sunscreens I highlight below have been thoroughly tested by myself.

Water resistant sunscreen (body)

One of the main problems I have with some eco-friendly water resistant sunscreens is that they can feel like you are slathering yourself in glue. Although the stickiest sunscreens typically stay on the best, it can get to the point where it feels almost impossible to rub in at all.

Photo courtesy of Sunscreen Shoppe
Nature’s Gate: Although this sunscreen has a few more chemicals than other sunscreens highlighted here, it works fairly well. It goes on easily and does not leave your skin overly white or greasy. This sunscreen works will for an hour or less if you are actively swimming, and longer if you are not spending too much time in the water.
EWG rating: 3
Photo courtesy of The Daily Green

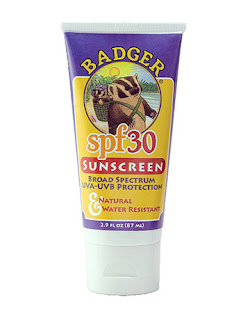
Badger: This is my go-to sunscreen for when I’m in the water at work. Teaching swim lessons mean I am in the water for up to 4 hours at a time. Little kids often grab onto my hands and arms, removing my sunscreen if it is isn’t tough enough. This sunscreen withstands it all! When I get out of the pool after a long day I have to really try to scrub it off. I have never gotten burned when using this, but I do try to reapply at least every 2 hours. As a warning, I would not use this on my face or back. It’s base is olive oil and I can see it potentially clogging pores if you have acne prone skin. Also beware that it will leave your skin looking blueish white.
EWG rating: 1

Photo courtesy of The Daily Green
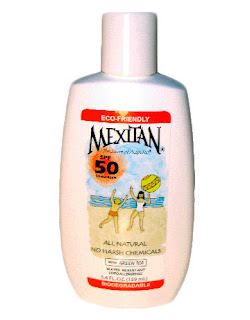
Mexitan: I should start by saying that this is my least favorite sunscreen. I actually refuse to use it and I have passed it on to my mom. This product could probably glue your class project together it’s so sticky. I struggle to rub it in and when I need to get my sunscreen on and get back to work in a few minutes, this just won’t work. That does not mean, however, that it does not work well. If you have the patience and you do not mind a slightly sticky sunscreen, this will work.
EWG: 3

Non-water resistant sunscreen

Some of these sunscreens may say water resistant on the bottle, but I have found that they work significantly better out of the water, and I will not wear them in the water.

Photo courtesy of Dealnay.com
BurnOut Kids: This is my favorite sunscreen when I have to spend a few hours on the lifeguard stand. Any time I will be out in the sun (and I will be staying out of the water) I bring this with me. The sunscreen seems really runny and I had my doubts about it the first time I used it, but I have not been burned when using it. It soaks in well and does not leave any discoloration or grease behind. This sunscreen is also comfortable when you are sweating in the warm sun.
EWG: 1
Photo courtesy of Gates for Kids
Nature’s Gate: This sunscreen rubs in well and does not leave a noticeable discoloration. It goes on a little oily, but it soaks in after a few minutes. However, it is the sunscreen with the most chemicals in it out of all of the ones featured here.
EWG: 4
Photo courtesy of Elle
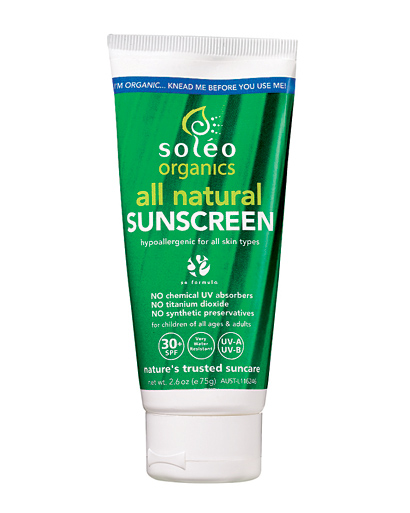
Soleo Organics: If you will be spending all day in a bathing suit and have a lot of skin to cover, I would not bring this one with you mostly because it is so expensive. Although this sunscreen works well. It goes on fairly greasy and my skin remained slightly oily the rest of the day. I keep this sunscreen in my bag and use it when I find myself outside longer than expected (it’s a great size for a purse or short travels). I have also used this on my face a few times and surprisingly did not break out.
EWG: 1

Face and lips

Photo courtesy of Daily Stoke
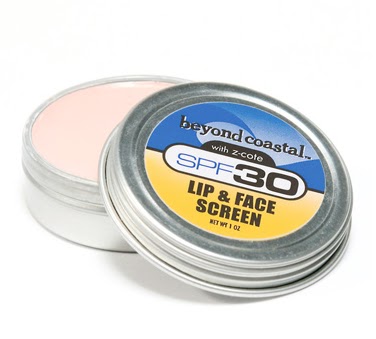
Beyond Coastal: I cannot say this enough, I love this sunscreen. I hate wearing zinc that leaves my face white, but this one soaks in clear. I know it’s a lifeguard stereotype to have the white nose, but it’s just not for me. I wear this sunscreen on my entire face and ears. I wear a full body wetsuit at work when I have to be in the pool for hours at a time, and I put this all over the tops of my feet and the backs of my hands. I can swim around and have kids grab my hands without it coming off at all. After 2 summers of having my nose burned every single day I worked (I’m not exaggerating. By the end of the summer my nose would be raw and peeling), I was so thankful to find this. Once I started using this I never burned my nose again. It does not clog my pores at all. It is easy to reapply right out of the water. I just have to dry my face real quick and throw it back on. This sunscreen is great for in and out of the water.
EWG: 2
Photo courtesy of ewg.org
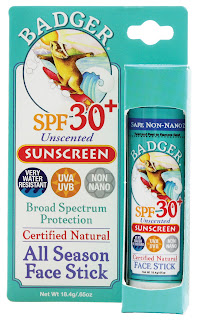
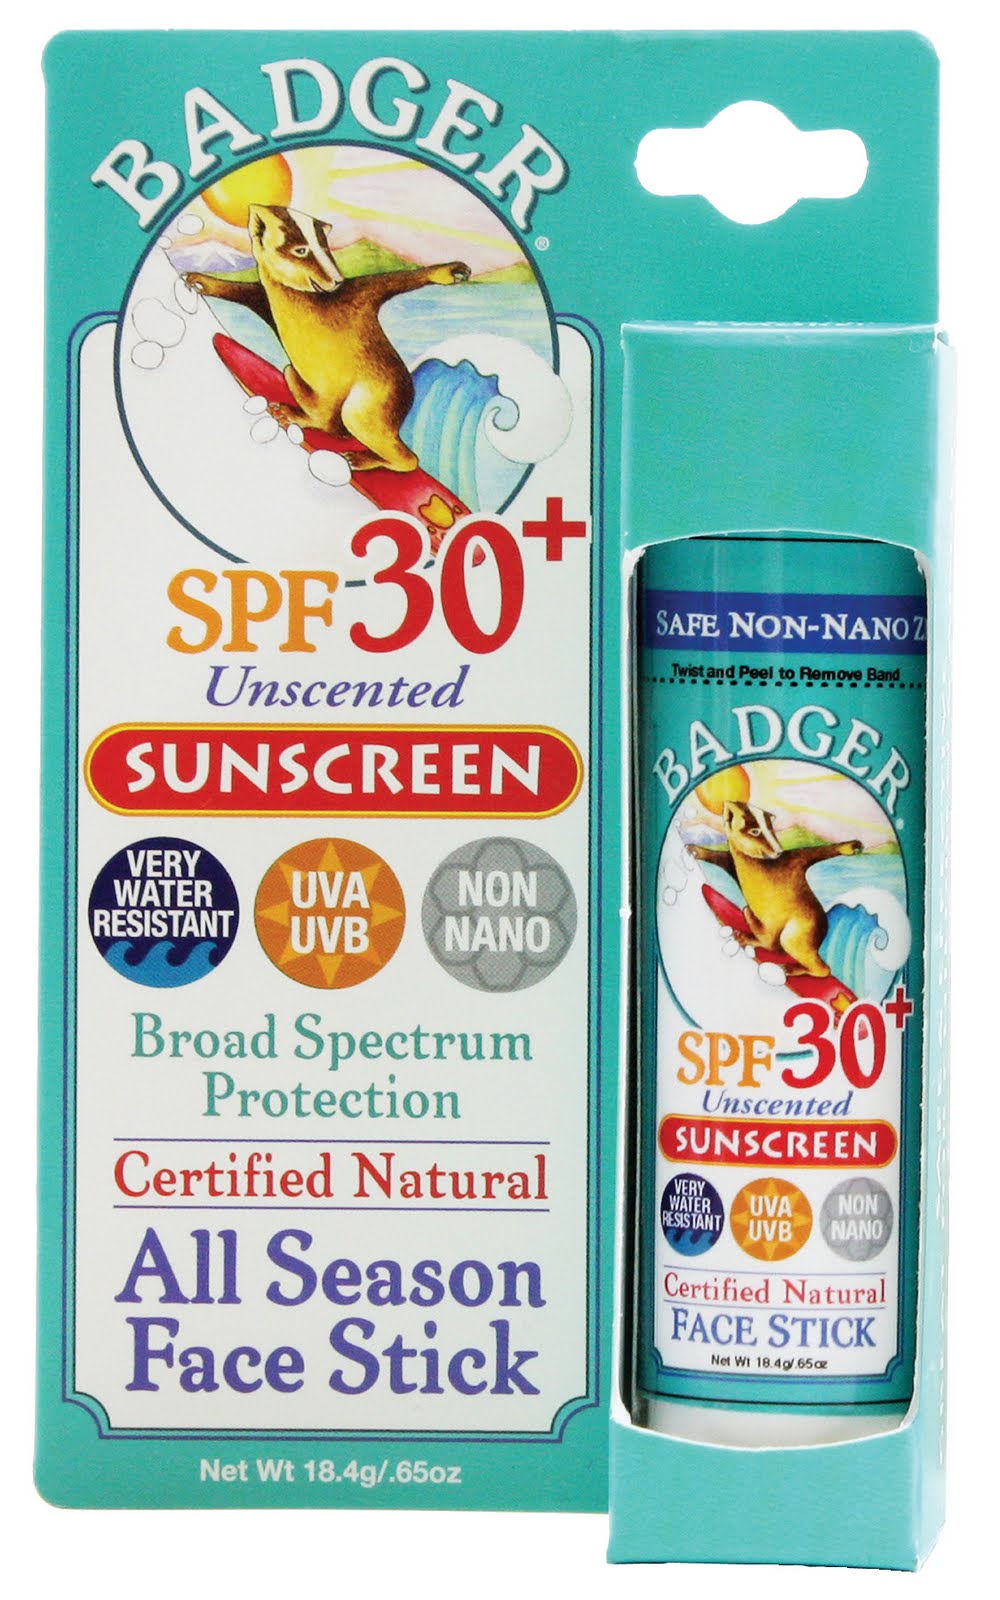
 Badger Face Stick: I tragically lost my Beyond Coastal tin last summer, and I bought this out of complete desperation. It works just as well and it’s nice to have a stick sometimes, but it does go on a bit white. I still highly recommend it and I will continue to use both the Beyond Coastal and this one this summer.
EWG: 1

Lipcotz: This sunscreen lip balm keeps my lips well protected from the sun. Some warnings though: It will color your lips because of the minerals in the sunscreen. It’s not a bad color and it’s worth the protection. I also use another lip balm underneath this one for some moisture because this one is really best to just block the sun, not moisturize.
EWG: 3

Best aftersun

Korress Yoghurt Cooling Gel: If you accidentally get a sunburn (don’t worry, it happens to the best of us) this aftersun cooling lotion is the best. It helps take away some of the pain, moisturize your skin, and keep it from peeling later on (unless you really burned yourself, then you will probably still peel).
EWG: 0

You can find any of the sunscreens featured here online as well as some grocery stores like Whole Foods.

More options:
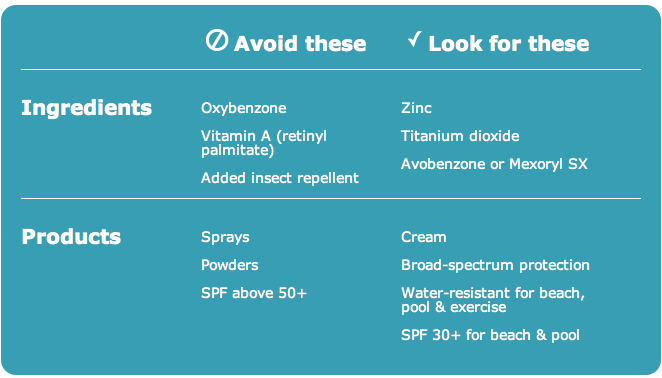
Wondering how your sunscreen is standing up? Check it against the EWG’s 2011 Hall of Shame sunscreens.

For more eco-friendly sunscreens that are safe to use, check out EWG’s list of some of the safest sunscreens.

Summer is around the corner: Your guide to sun safety

As the weather warms up everyone rushes outside, but most people forget to protect themselves with sunscreen.

When you do remember to grab the sunscreen, have you ever thought about what’s in it? Reading the ingredients in sunscreen feels like a chemistry lesson gone horribly wrong. As with any product, knowing what’s in your sunscreen is key to protecting yourself from harmful chemicals and the harmful rays from the sun. This post will outline some of the basic things you to need to know before you head out to enjoy the weather.

Photo courtesy of AllPosters.com

How to protect yourself without slathering up:

Before you start breaking out the tanks and short-shorts, consider going old-school and covering up. Covering up with a shirt and a hat are easier and better for you than trying to get chemicals to absorb the sun’s harmful rays. A lightweight long sleeve shirt won’t wear off and you will not have to remember to reapply it.

Hang out in the shade instead of baking in the sun. Think your tan is too cool? Any darkening of the skin is a sign of skin damage. Once you are burned you have drastically increased your risk for skin cancer. Not to mention that no one wants to look like a lobster.

Have you ever thought about what your wrinkles will be like when you are older? Gross. Not to mention the increase risk of getting skin cancer.
Image courtesy of Think Nice
(This image has haunted me since my high school swim coach emailed it to all of us as a not so gentle reminder to use sunscreen.)

What to watch out for:

If you need to use sunscreen keep these quick tips in mind:

Image courtesy of EWG

9 surprising truths

This year the Environmental Working Group compiled a list of truths about sunscreen. For more information on them you can go here.

1. There’s no consensus on whether sunscreens prevent skin cancer.

2. There’s some evidence that sunscreen might increase the risk of the deadliest form of skin cancer in some people.

3. There are more high SPF products than ever before, but no proof that they’re better.

4. Too little sun might be harmful, reducing the body’s vitamin D levels.

5. The common sunscreen ingredient vitamin A may speed the development of cancer.

6. Free radicals and other skin-damaging byproducts of sunscreen.

7. Pick your sunscreen: nanomaterials or potential hormone disruptors.

8. Europe has better sunscreens (and more options)

9. The 34th summer in a row without final U.S. sunscreen safety regulations.

Check back tomorrow for my favorite eco-friendly sunscreen choices.

Toxic Heavy Metals in Cosmetics

After all of the posts I have had recently on dangerous materials in cosmetics, I was excited to see a post on Treehugger.com about a new study from Environmental Defense Canada. The study found that toxic heavy metals have been found in 49 products tested even though none of heavy metals were listed on the label.

Photo courtesy of Environmental Defense Canada

TreeHugger.com nicely summarized the article:

“The study tested 49 products from popular brands like Laura Mercier, MAC, L’Oreal, Mary Kay, and Sephora and found that 100 percent of the products contained nickel, 96 percent contained lead and 90 percent contained beryllium. Only one product, Annabelle Mineral Pigment Dust (Solar), was found to not contain a single metal of most concern.

On average, products contained four of the eight metals of concern—mercury, arsenic, beryllium, cadmium, nickel, lead, selenium, and thallium. The Benefit Benetint lip gloss contained the highest level of lead at 110ppm, which is 10 times higher than the limit set by Health Canada.
The heavy metals found in the products tested are categorized as unintentional contaminants. They are not required to be listed on the labels, which is why it may come as a shock to some that they are in the products in the first place. The Campaign for Safe Cosmetics points out that, in Canada, there are draft guidelines for impurity levels of some metals it believes are “technically avoidable.” In the United States, there are no standards for these metals in cosmetics, nor are there “draft guidelines.”
“Individual exposures to these metals in small amounts are unlikely to cause harm, but heavy metals can build up in the body over time and may increase risk for a variety of health problems,” the Campaign for Safe Cosmetics reports. Meaning, if you’re using cosmetics laden with heavy metals on a daily basis, or more than once daily, you could be putting yourself at risk.
Visit Environmental Defence to download the report (pdf) and make sure your favorite products aren’t listed. While you’re there, sign the petition asking Health Canada to better regulate impurities in cosmetics.
Are you shocked? Or is this what you’ve come to expect from the cosmetic industry?”

I don’t know about you, but I am sadly not too shocked. I am appalled that this is going on without any regulation or reprimands. Instead of continuing to support this dirty industry, we need to boycott their products by refusing to buy them and educate others about the dangers of the products.

Want to know more? You can also look at the Campaign for Safe Cosmetics.

Homemade Jojoba Moisturizer for Acne Prone Skin

I have had acne for what feels like forever now, but is probably more like 10 years. I have tried nearly all dermatologist prescribed medications with little to no results. So when I say this oil works, I mean it.

I know it seems completely counter productive to put oil on an oily face that is prone to acne, but just hear me out. Because jojoba is actually a liquid wax and not an oil, it behaves differently than we expect. The jojoba “oil” is very similar to the oils that your skin naturally produces. Because of this similarity, when you use jojoba your skin responds by not producing excess oil.

The oil soaks in quickly, and then you have skin that is not shinny, but well moisturized all day. You have to give your skin about 2-4 weeks to get used to the oil before it will stop producing extra oil. After a month my skin no longer got oily, even if I forgot to wash it in the morning.

This recipe has been a lifesaver for me. In the summer I swim and lifeguard which means my skin gets so dry it peels. The jojoba helps keep my skin hydrated while not increasing my breakouts all year long. Another reason I love this recipe is because of how cheap it is. The oil is 8oz for $16, and it has already lasted me more than a year.

Ingredients

4 oz bottle with dropper (cleaned and boiled)
jojoba oil (organic is preferred)
1 teaspoon vitamin E (as an antioxidant as well as a preservative)

Use a funnel to add the 1 teaspoon of vitamin E. Add the oil until the bottle is nearly full and shake to mix it.

If you would like you can add essential oils for smell or other benefits, but I like to keep anything that is going on my face as simple as possible. Be sure to test any oils slightly diluted behind your ear to be sure you will not have an allergic reaction as well.

I ran out of vitamin E a while ago, and so far I haven’t had any problems just using the jojoba oil straight. If you use the oil fast enough and want to save a few bucks, I would recommend leaving it out.

You can find all the ingredients and necessary materials locally, online, or at mountainroseherbs.com.

Enjoy!

Homemade Rose Face/ Body Oil

This homemade rose oil blend is perfect to use on all dry skin including elbows, hands, feet, and everything in between. If you have a dry face and you do not break out very often, this oil can also be used a moisturizer. For men this makes a great after shave soother or a dry skin salve. It also makes a great gift!

What you will need:

A small funnel
4 oz bottle with dropper (cleaned and boiled to prevent bacterial growth)
Apricot or sweet almond oil for the base
Vitamin E oil
Essential oils: rose and any other scent you like
This recipe is adapted from Gorgeously Green:
1. Fill the bottle (using the funnel or you will have quite the mess, trust me) about 3/4 of the way full with either one of the base oils (I used apricot)
2. Add one teaspoon vitamin E oil (vitamin E is not only a powerful antioxidant that is good for your skin, but it also acts as a preservative to inhibit the growth of bacteria)
3. Add 5 drops rose oil (an added benefit of the rose oil is that it helps to lighten spots on the skin, including freckles. I freckle very easily, and my hands hardly have any freckles while my arms are full of them because I use this oil on my hands every night before bed.)
4. Add 5 drops each of any two essential oils you enjoy. I am not a big fan of floral scents, but I enjoy citrus. To cover the smell of the rose oil I used 5 drops orange and 5 drops lemon essential oils. For men, this is a great place for you to make the oil more “manly.” You can add any scent you want, including cedar, lemongrass, cinnamon, and citrus.
5. Fill the bottle almost completely full with more of your base oil (be careful, when using a funnel. It is easy to overfill the bottle without realizing).
6. The vitamin E oil settles to the bottom, so shake it up and enjoy!
All ingredients for this recipe can be found at some local stores, but it is easiest to find them online. I bought mine from MountainRoseHerbs.com. They have a wide selection of organic oils as well as the bottle and funnel you will need.