Treading Lightly
Treading Lightly

homemade recovery Ice bath

I started training for my half marathon with a nagging foot injury and an irritated shin. Definitely not putting the best foot forward on the entire experience, but one of the benefits of starting with pestering injuries is that I got into the habit of taking care of my poor legs and feet. In addition to foam rolling and stretching religiously, I started to ice bath.

After reading about how ice baths can help improve recovery and help prevent injuries, I decided it would be good to give it a try. But one major thing got in the way. I hate to be cold. I would rather be pouring sweat from being too hot than have to shiver even a little. I get cold so easily that I consider icing an injury on par with torturing someone for information. So the idea of purposefully putting my entire leg, or even part of my leg, into cold water was hard to get over.

IMG_2176 - Version 2
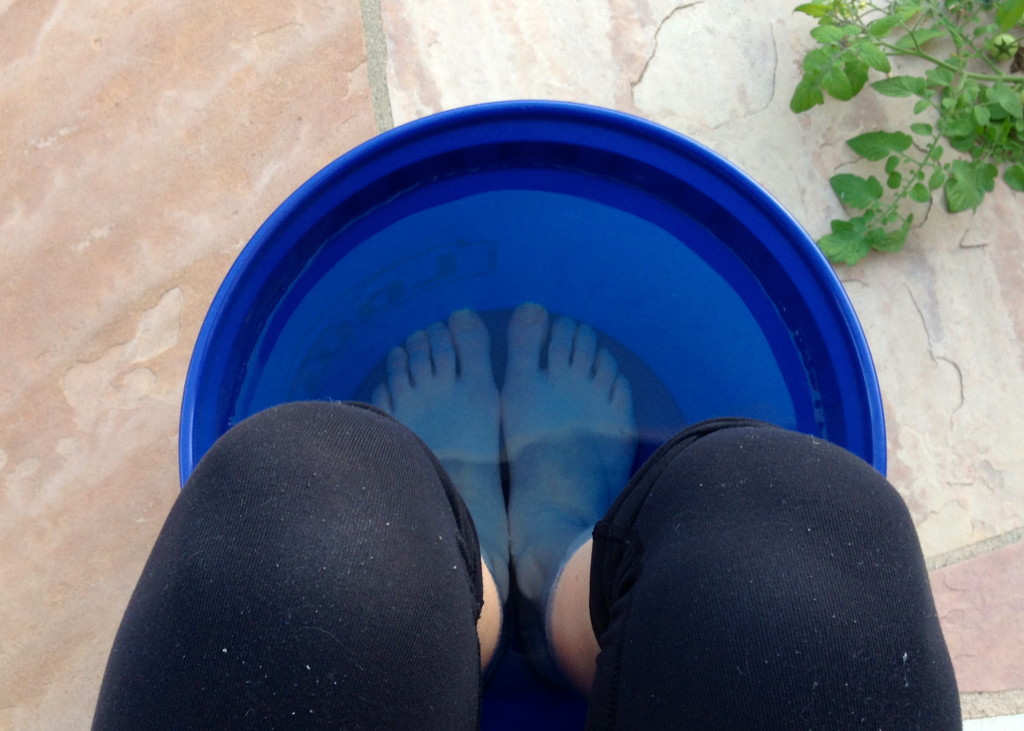
To start out, instead of filling a bucket full of ice and a little water, I used straight tap water. Where I live the water comes out at about 65 degrees, which doesn’t sound too bad until you put your warm feet into it, then it’s frigid. I slowly built up to adding a couple handfuls of ice at a time. (And despite what the picture above looks like,) I put in about 4 handfuls in the beginning and add a few more once I get a bit used to it.

Even though I still hate putting my feet in, it’s nice to be able to “ice”  my entire lower legs and feet at the same time. In 15 minutes I’m done and putting on my cozy socks to warm up. To make it more tolerable I also wear multiple layers or wrap myself in a blanket and I try to sit in a warm spot (like in the sun on the patio). When it’s windy I sit on the edge of the tub with my bucket inside of it to make pouring out the water and drying off easy.

It turns out after hobbling through 9 miles, I put up a lot less resistance towards dunking my lower legs into icy water.

My Gym bag essentials

At least three days a week I pack up a change of clothes to be ready to go at any moment like superman (only I don’t know where he kept his 2nd outfit…). It is now to the point that without my gym bag I feel like 1. I’m missing something, 2. I never have what I need and 3. My purse just doesn’t have enough room.

Between CrossFit, yoga, and running, I need a wide variety of items. When I buy workout clothes, I always make sure I can wear them for two of the three activities at the least, but the goal is always something that can be used for everything, preferably year round. This not only makes packing easier (it means I can decided right before I leave work if I want to run or go to yoga (or both) for instance), but it also saves me space in my bag.

Before when I was able to get dressed at home, I used a small messenger bag for my gym bag. It fit all the accessories (extra hair band, deodorant, etc.) that make the gym more pleasant without taking up too much unnecessary space. But now that I have to bring an entire head-to-toe wardrobe with me, I had to go for a bigger bag. I opted for a backpack because it fits everything in it well, it’s easy to commute with, and it holds up well while being dragged all over the place.
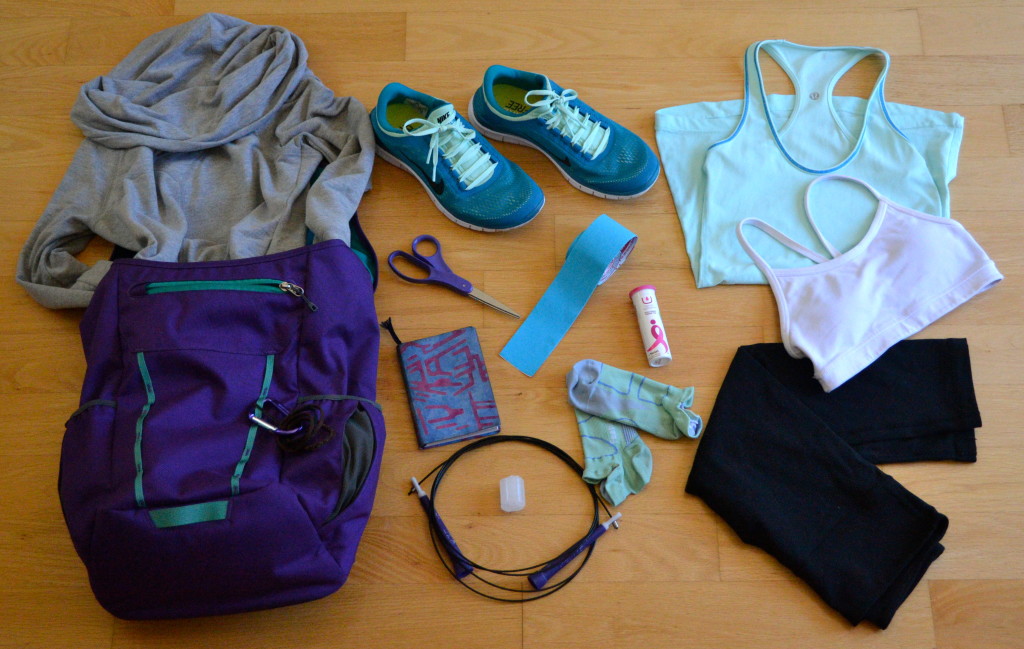
CrossFit running gym bag essentials

What’s in my gym bag:

1. Extra hair ties: I have thick, wild hair. There is no way I would be able to get through a workout with my hair down, or even with just one hair band. I keep extras clipped to my backpack with a carabiner for easy access and to keep me from losing them.

2. After workout layer: In the summer I bring a light long sleeve or another shirt to change in to so the ride home is more comfortable. Now that it’s fall I’m starting to need something to keep me warm.

3. A pair of shoes that I can run or do CrossFit in. I know, it’s practically a sin to not do CrossFit in anything that doesn’t say Reebok on the side these days, but I would rather have one pair of shoes that will do just about anything. It’s better for my closet (less to try to shove in there), my wallet, and the environment.

4. Scissors and athletic tape: I currently use stretchy athletic tape to support my wrists (but I’m working on getting some wrist wraps) and to keep my hands from tearing when I do a lot of bar work or pull ups. I hate having to ask for scissors or try to bite my way through the tape, so I keep them in the bag at all times now.

5. My workout journal: I track all of my CrossFit workouts on paper and my runs electronically with Nike+. I not only write down what I did that day, but I also keep track of my PRs and the weights I have been using in the back of my notebook so I can quickly calculate what weight I should be using in any workout.

6. Nuun hydration tablets: I don’t frequently use them, but in the height of summer when I was sweating what felt like swimming pools, I made sure to get in some extra electrolytes when I was done. These are also what I’ve been using now that I’m getting into high mileage runs for my half marathon training.

7. Quick dry, wicking running socks: I wear these whether I’m running or at CrossFit to prevent blisters and avoid turning my shoes into a swampy mess.

8. Speed rope: double unders were impossible before I bought my own speed rope and adjusted it to my height. At my previous gym they didn’t have any speed ropes, but even at gyms that do have them, I like not having to fight with everyone else my size for a rope.

9. Deodorant: I use a crystal deodorant, not an antiperspirant, before and after every workout (and daily). Because of the recent concerns about breast cancer being linked to the aluminum in antiperspirant and the fact that your body gets rid of toxins and waste through sweat, I no longer wear antiperspirant. I haven’t worn it for years, and it’s been great. The crystal deodorant has by far been the best option for me and not only does it keep me from smelling, but it lasts forever (not really, but I bought a stick 2 years that is 5 times the size of the one in the picture, and it’s still 95 percent unused after two years of daily use) and doesn’t stain my clothes.

10. Clothes: I wear crops most of the year for many reasons, but the main ones are that I get cold easily, squatting in short shorts makes me highly uncomfortable (I’ve seen many shorts malfunctions that lead to accidental (I hope) flashings), and they are great for running, yoga, and CrossFit. I wear crops with tanks in the summer and long sleeves (and sometimes a jacket too) in the winter. I also wear sports bras with all of my shirts instead of buying tanks with them built in because I can mix and match colors and I don’t need to buy them extra to wear in the winter with long sleeves.

What is a must have in your bag?
Five weeks until race day

I used to think running four miles was an inhuman feat. The first time I ran a 10k I thought it was ridiculously long and torturous. And yet somehow along the way I still ended up thinking that doing a half marathon would be fun. In theory, and from other people’s race pictures, it does look fun, but setting out every other day to run the same route over and over again is wearing me down a bit. The thought of how many miles I have to do as I lace up my shoes before my run can be completely paralyzing. But after finishing 8 miles last weekend, a distance most certainly deemed impossible while double knotting my shoes, for some weird reason 9 doesn’t seem so bad and 13.1 doesn’t feel all that far off.
DSC_0098
I’ve reached the point in training where I know I will finish. I won’t break any records and my pace won’t be spectacular, but we are going to have a blast. We are going to walk when we are tired, take pictures, laugh, and enjoy every single one of those 13 miles.

Now when I lace up I think about how I’ve already done 8 miles and I have more than 75 miles behind me since I started training. When I get tired and I want to cut the course and walk home, I think about all of the times in the past three months that I kept going and keep putting one foot in front of  the other. When I think about how bored I am running the same places, I imagine what it’s going to be like to watch the sun rise over San Francisco and start our run with thousands of other people at one of my favorite running spots, a place that feels like home. When I get home and have to shove my feet into my freezing ice bath (more on that fun soon), I think about how accomplished I’m going to feel when I cross the finish line and how amazing my celebratory meal is going to taste. In 5 weeks I’m going to cross the finish line with a huge smile on my face and from now on I’m practicing that smile on every run.

Rainbow carrots to brighten a lunch

Do you ever have those days where you are sitting at work thinking about lunch and you wish you had everyone else’s lunch and not yours? I fall into the trap of making whatever is easiest, including reaching into the freezer the night before and deciding that random leftovers would be better than actually taking the time and thought of making a lunch I will be excited about.

One thing I like to do to break the monotony with fun new vegetables, dips and dressings, and snacks. I have always been drawn to rainbow carrots in an unexplained way. The taste is not all that different from your every day orange variety, although they are slightly less sweet, which makes them easier to dip in just about anything. To be honest, the color is the real draw. I mean really, how often do you get to eat something so vibrant (or as fun as a carrot that is purple on the outside and bright orange in the inside?).

Rainbow carrots 1 rainbow carrots cut

Lately I have been cutting them up like “chips” and eating them with humus. I also cut them finer and add them to salads for crunch (my vegetable substitute for a crouton). They are also nice to snack on by themselves. While I might be eating something I have unearthed from the freezer, at least I will have a little something to brighten my day.

7 weeks to go: half marathon training update

I’m one of those people that is either going full speed or not moving. I don’t have any gears in between, which doesn’t work very well when coming back from an injury. My mind says “slow down” and “gently increase mileage” and my body says “sprint up this hill,” “pick up the pace,” and “no need to walk.”

I know I should be running at a much slower pace and mixing in walking to decrease the stress on my body (which has been very clear in the past that I was pushing too hard too fast), but once I put on my shoes and I get outside, all of those rational thoughts fall away.

But I know that the only way to reach my goal of finishing my half marathon in October is to slow down and learn to be rational while running and take preventative measures like walking even if I feel great when I’m running. And all of the hills along my long run beach route sure do help make walking seem like a great idea.

Part of getting myself to let go and slow down is to run by time instead of miles. I’m following a modified version of Lululemon’s Sea Wheeze training guide, and three of the four weekly runs are by time. This mean that when I’m walking I’m not focusing on how many miles I have left and how long it will take, instead I am still outside doing what the training guide told me to do, moving in a forward direction for a specific amount of time.

Linda Mar Beach Pacifica Trail Running

Mixing in walking has actually made my runs more enjoyable, and now that I have finished a nearly 7 mile run, hills and all (something previously thought impossible) I’m feeling stronger and more prepared. Now I just need to make it through my 8 mile run next week.

10 weeks until race day

When I signed up for the Nike Women’s Half Marathon I envisioned myself training for six months and then running the entire thing without stopping to meet an impressive time goal.

That idea has passed and it has set in that I am facing a new reality. With a knee injury that kept me from running for 2 months and then a foot injury delaying my training another month, I am extremely off track. Now that I have my knee and foot better, my shin is acting up from starting to dive into training too quickly, which has yet again left me with my running shoes on the floor and my feet up on the couch.

I’m not the kind of person that handles setbacks or delays incredibly well. When I have a plan I expect to follow the plan to the t and meet my every goal. Now, 10 weeks before my half marathon it’s time to realize that it’s too late for that plan and accept my reality. The good news is that my friend that I am running the race with is fully supportive of the new plan, which involves just enjoying the race, taking it slow, and running and walking as we feel like it.

And you know what, I think it’s actually for the best. I want my first half to be for the experience so next time I know when it gets hard, I know how far I can push myself, and I know what to expect from myself and the beast of 13.1 miles. So maybe I won’t have my grand finish and my time won’t be anything to write home (or here) about, but it’s still going to be a blast. So instead of stressing about being months behind on my training plan, I’m going to start from zero and see how far I get before the race. And I’m not going to stress about what I do or don’t do along the way.

Healthy, homemade granola

When people would tease me for being a hippy I would always joke that I don’t make my own granola. Too late now. With my nut allergy, the store-bought granolas that won’t kill me tend to be either extremely high in sugar or nutritionally poor (or both). It’s also like pulling teeth to find any at all that don’t have nuts in them.

But even if you don’t have to worry about nuts, homemade granola can save you money and waste. Not to mention it gives you complete control over the nutrition and the flavors. You can make your granola completely your own by adding in or taking out whatever you want. In theory I could make my granola different every time, but why mess with something that works?

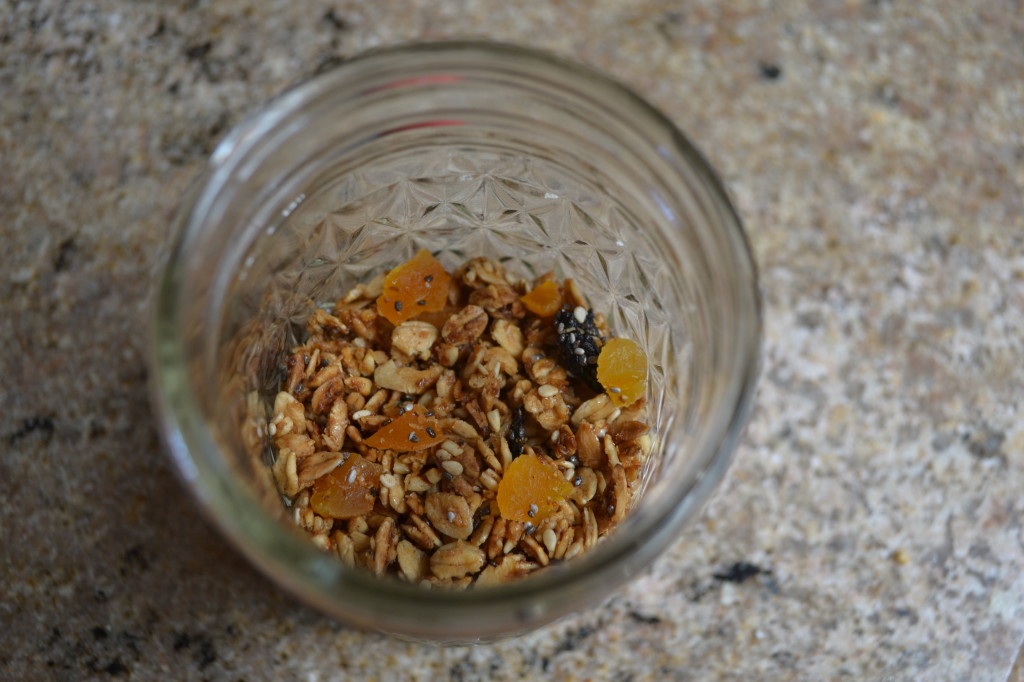
healthy homemade granola in mason jar

Ingredients:

coconut oil for pans
3 cups thick rolled oats
1/2 cup steel cut oats
1/2 cup shredded coconut
1/4 cup sesame seeds
1/4 cup chia seeds or 1/4 cup flax seeds (or both if you are feeling daring)
1/4 cup amaranth, uncooked
1/4 cup brown sugar or honey (I don’t usually pack it, but if you like your granola really sweet you can)
1/4 cup maple syrup
1/4 cup coconut oil
1/4 cup freshly squeezed juice from an orange
1 teaspoon (or more depending on desired taste) ground cinnamon
1 teaspoon pure vanilla extract
1 and 1/2 cups diced dried fruit (I like apricots and tart cherries, but apple, cranberries, or any other dried fruit would be good.)

Recipe

1. Preheat the oven to 300F

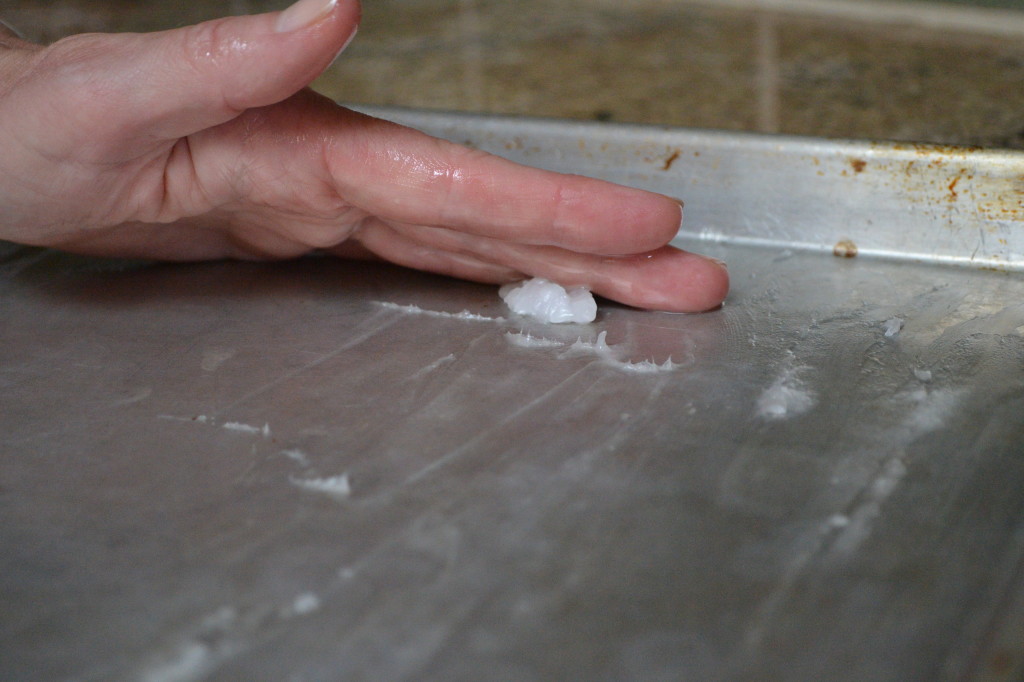
2. Lightly grease two baking sheets (you absolutely want ones with sides for this or you are going to have a nightmare of sticky oats to scrape out of your oven and off your stove).

homemade granola coconut oil

3. Combine all of the dry ingredients in a bowl (except the sugars, spices, and dried fruit) and mix well.

4. Combine the wet ingredients including the brown sugar, maple syrup, coconut oil, cinnamon, and spices. Whisk well until combined. (I melt the coconut oil before I try to combine to make it easier and help the sugars begin to melt.)

5. Mix together the wet and dry ingredients from steps 3 and 4 in a large bowl (everything except the dried fruit should be included).

6. Divide the mixture between the two baking sheets with sides that you had greased earlier and spread them out as evenly and thinly as possible.

7. Take the sheets out of the oven and flip/mix the granola every 10 minutes to prevent it from burning or drying unevenly.

8. Bake until its a deep golden brown, between 40 and 60 minutes depending.

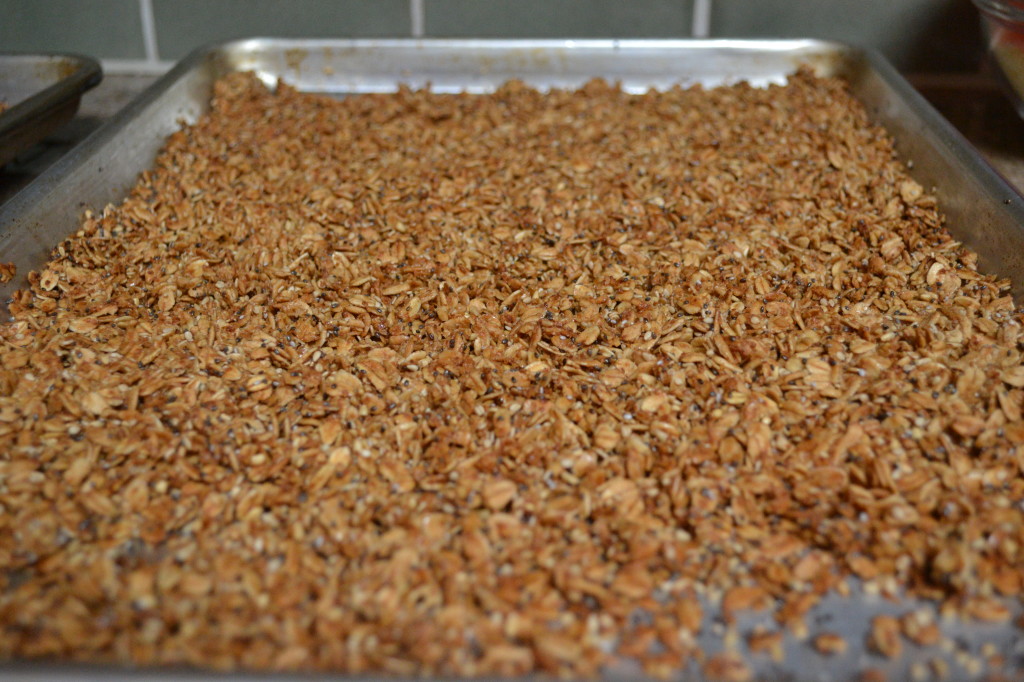
9. Once you like the color, pull them out of the oven. However, be ware that if the granola is not dry enough it will be a clumpy mess when it dries and it will be like trying to chew threw a granola brick, so you do want to be sure that is a deep brown, not lightly browned. The tricky part is that no matter when you pull it out of the oven the granola is going to be sticky and moist until the sugars harden up again and make it crispy and crunchy. Put the pans on a wire rack and allow them to cool completely.

homemade granola
10. When the granola is cool, mix in the dried fruit and put it in an airtight storage container. You can store it at room temperature for a few weeks or put it in the freezer to extend it’s life.

Recipe adapted from Tom Douglas’ The Dahlia Bakery Cookbook.

Bloglovin’

I don’t know about you, but after the Google Reader disappeared, it’s been a struggle to keep up with my favorite blogs. To make it easier for you, I’m going to start using Bloglovin’. You can follow all of your blogs in one spot, and what I really like about it is that you can go back and look at posts you have already seen. The best part, sign up and you can have my posts sent straight to your email – It doesn’t get any easier than that.

Follow my blog with Bloglovin