Treading Lightly
Treading Lightly

My 100th post

It seems crazy to me that I have written 100 posts since April. I just wanted to let everyone know how thankful I am for every person who reads my blog, talks about it, laughs at it, spreads the word about it, and talks to me about it. I can’t wait for the next 100’s of posts.

Image courtesy of Ansel Adams

Chocolate Texas Sheet Cake

Lately I have been practicing dishes that feed at least six people so I can get used to making them quickly. This chocolate Texas sheet cake is incredibly easy to make and it feeds crowds. I highly doubt there is a cake as moist and delicious that is this easy and quick to make.
Cake ingredients:
2 cups all-purpose flour
2 cups granulated sugar
1 teaspoon baking soda
1 teaspoon ground cinnamon
1/4 teaspoon salt
3/4 cup water
1/2 cup butter
1/4 cup unsweetened cocoa
1/2 cup low-fat buttermilk
1 teaspoon vanilla extract
2 eggs

1. Coat the pan with a light layer of butter. (I use a napkin and run it over room temperature butter before rubbing it onto the baking sheet in circular motions. You only need enough to make the flour stick.) Dust the pan with about 2 teaspoons of flour (I used a tablespoon and then put the rest of the flour back into the container.)

Every time I butter the pan I think of baking with my neighbor as a child. My mom was helping me and my neighbors (sisters, one 3 years older than me and one 3 years younger. We were probably 5, 8, and 11) make a cake. My mom gave the oldest sister a napkin with butter on it and asked her to butter the pan. When we turned around again we realized that she started to butter the outside of the pan. Having never really baked before she assumed the entire pan needed to be covered. It still makes me laugh).

The pan should be just barely coated in flour to keep the cake from sticking.


2. Preheat oven to 375 degrees F.
3. Combine flour, sugar, baking soda, cinnamon, and salt.

4. In a small sauce pan combine water, butter, and cocoa. Bring to boil, stirring frequently. Remove from heat.
5. Pour mixture straight from the stove into the flour mixture.
6. Beat at medium speed until well-blended.

7. Add buttermilk, 1 teaspoon vanilla, and eggs. Beat well. (Be sure to let the mixture sit for a few minutes and beat the mixture quickly after adding the eggs to be sure that you do not cook them in the batter.)

8. Pour batter into prepared 15×10 inch pan (or 13×9, refer to longer cooking time).
9. Bake at 375 for 17 minutes, or until a toothpick comes out clean from the center. (for 13×9 inch pan bake 22 minutes).

Frosting ingredients:
6 tablespoons butter
1/3 cup fat-free milk
1/4 cup unsweetened cocoa
3 cups powdered sugar
2 teaspoons vanilla extract

1. Combine butter, milk, and cocoa in a medium saucepan. Bring it to a boil stirring continuously.
2. Remove from heat and gradually stir in powdered sugar and vanilla.

3. Pour it over the hot cake straight out of the oven.
4. Cut the cake into 20 servings

When the cake is cut into 20 even servings, the nutrition ends up being:

Calories: 298
Fat: 10g
Protein: 3.1 g
Carb: 49.8
Sodium: 188mg
Recipe and calories from cooking light. 

Flow: For love of water

As summer is heating up we are using more and more water both around the house and in our gardens. Flow: For love of water reminds us of where our water comes from and the battles over the rights to water.

This movie has increased my awareness of the water I use and the scarcity of water on a world scale. Now it is up to us to determine what we will do and where we will go from here.

Living sustainably on a budget: Recipe binder

I cannot make anything without a recipe. At home my mom has books, a binder full of recipes, and a box full of torn magazine pages or printed recipes. Now that I will have my own kitchen and I will be cooking for myself (and roommates) on a daily basis, I need to start building my own collection of recipes. Buying recipe books is really not a good options for college students or anyone else who will be moving. They are bulky, I never like more than a few recipes out of them, and they take up way to much room for very little use (not to mention the environmental impact of the production).
Instead of lugging around books and trying to dig through them for something to eat every day, I am making myself a recipe binder. I have it broken into sections and I am slowly adding recipes I have found online as well as photo copies of some of my favorite recipes from home. A recipe binder is fantastic for tons of reasons:
– All of your recipes are in one place
– It is only one item to move
– You choose what goes in it, meaning no space is wasted by terrible recipes
– It is tailored to your tastes
– It is incredibly easy to expand and continually build upon. Once you fill up the binder you can break each section into its own binder, or just the largest ones (at home I made our binder into two, desserts and everything else because desserts was our largest section).

I broke mine up into breakfast, veggies, sides and snacks, mains, and desserts. Feel free to make your dividers any way that makes sense to you.

Right now I only have about 30 recipes in my binder (and the majority are, of course, desserts), but as school gets closer I plan on finding and trying more recipes so I have more options before I have to cook on my own.

Food storage without plastic (for the most part)

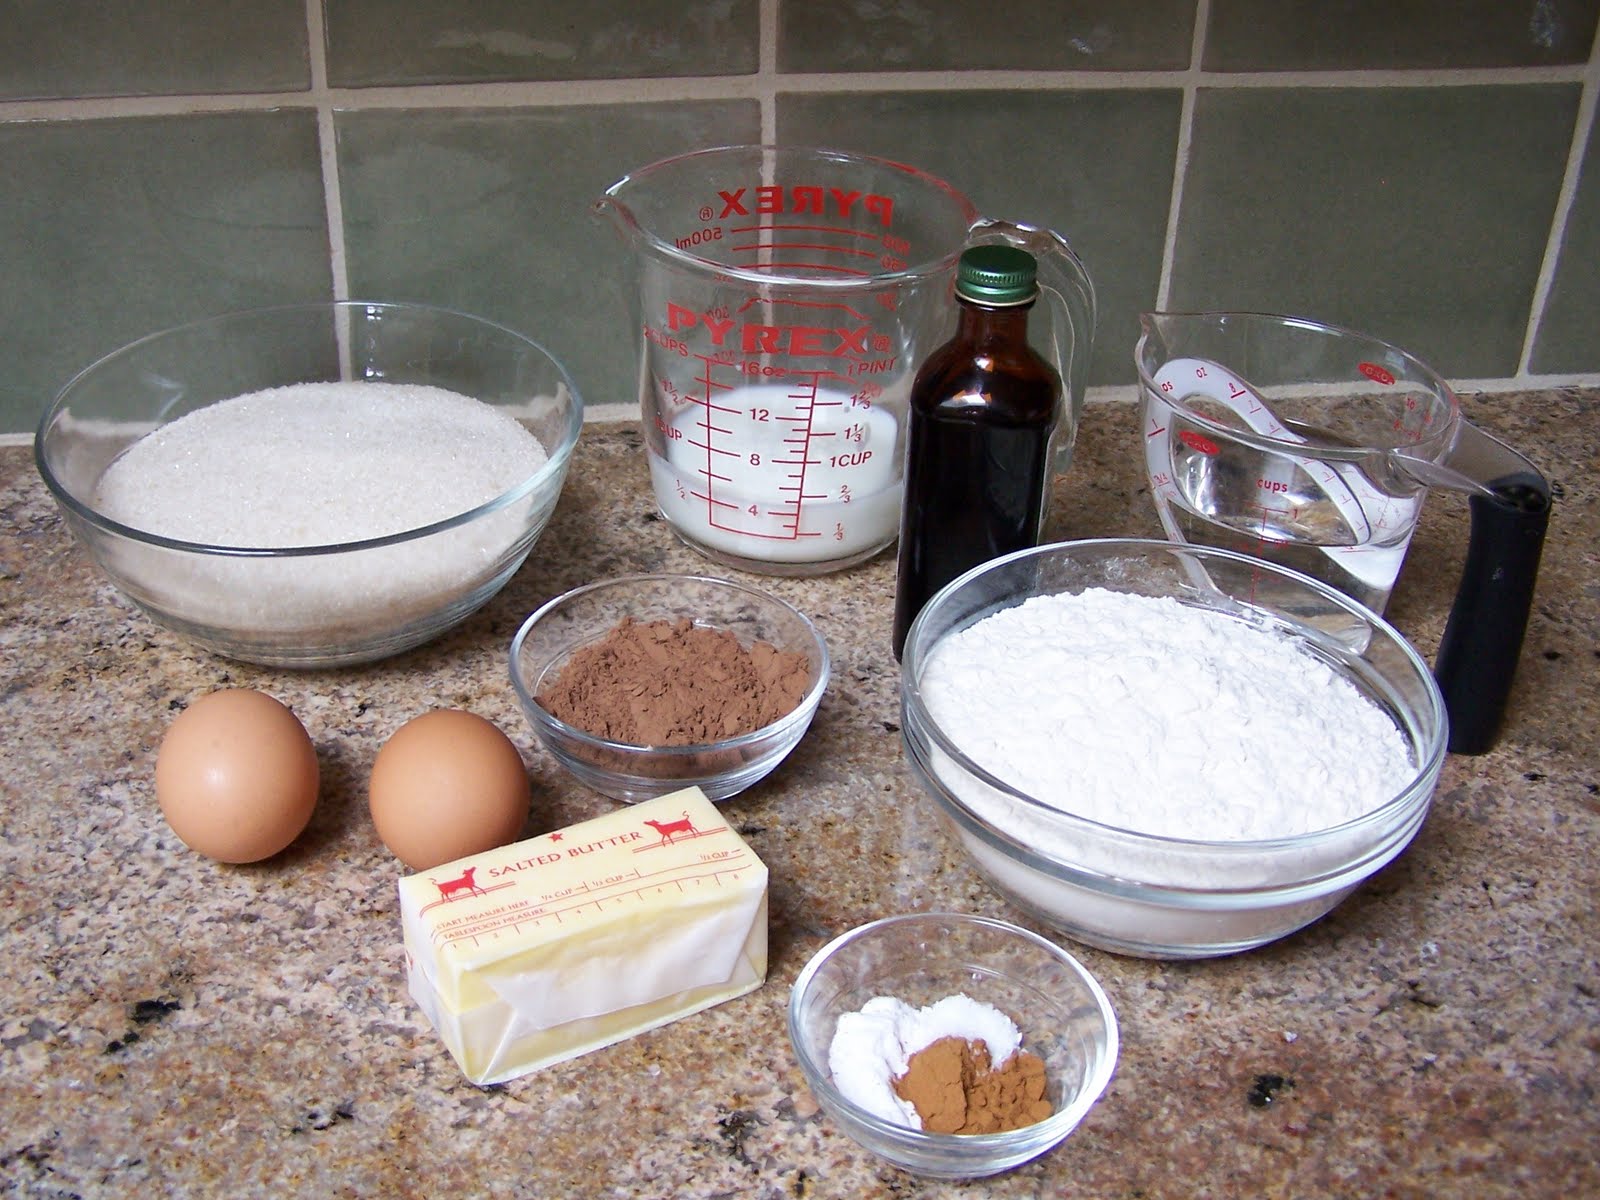
At work this summer (and at home) I was teased mericlessly for my stainless steal containers that I carried my lunch in. I have them in various sizes so my entire lunch fits snuggly inside their cool, shinny interiors. I am able to pack my entire meal without using a plastic container or a paper/plastic bag.

To some people it may sound like an incredible pain to carry around so many little containers of food instead of putting snacks in bags that can be tossed when empty, but there are incredibly benefits that make the extra bulk completely worth it.

1. Plastic containers leach chemicals into our foods. It is important to keep these carcenigens out of our bodies as much as possible. This is why it is especially impotant to not pack childrens’ lunches in plastic.

2. Plastic is often a sigle use product. When the cheap plastic containers first came out people were throwing them away right and left. Even though it has since become a practice to wash and reuse these containers, they are still part of our disposable culture.

3. Plastic “snack” or “sandwich” bags are used once before they are put into our landfills and waterways where they do not break down or decompose completly. We are creating mound and mounds of this pollution that we have no way of getting rid of or breaking down. We are constantly adding to the problem without considering the consequences.

4. Plastic absorbs colors and tastes from our foods. I am sure everyone has seen a plastic container stained by a tomato sauce. If it is that easy for plastic to absorb something else, how easy do you think it is for it to leach out as well?

5. Plastic is cheap. I mean this in two ways, the price of course, but also in the durability of the product. Plastic containers are always splitting or melting in the dishwasher.

6. They are plastic. I know I am constantly talking about the dangers of plastic, but it seems like most people do no understand the true risks they take when they purchase or use plastic (let alone the harm it does to the enviornment or the workers who created the product). (Check back soon for the truth about plastic.)

Discouraged yet? Do not worry, there are quite a few options for storing food that do not involve plastic or that reduce the amount of plastic (there typically has to be some type of plastic or silicone in the lids. Just remember to not heat food with the lids on).

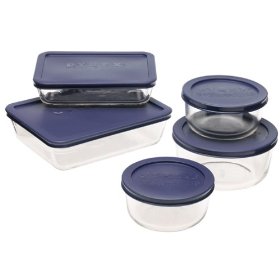
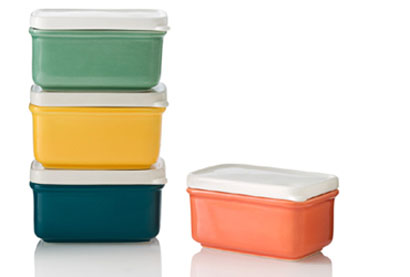
1. Use glass food containers. Many come with silicone lids and are easily washed and stored. In the years my family has had glass containers I think we have only broken one (and we take them in our lunches as well as store food in them at home). Durability is certainly not a problem. The best feature: you can heat your food in them in the microwave. You can find them online as well as in most kitchen stores and major stores (such as target). Also do not be afraid of reusing old jars.

Image courtesy of Bad Plastics
Image courtesy of Jeri
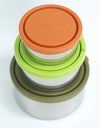
2. Metal food containers: Although my coworkers may have asked me constantly why I was eating Tuna out of a can (for some reason they thought this joke was hilarious), I love my metal containers. They are incredibly durable, and wash easily. The only bad part is that you cannot microwave food in them. I mostly reserved these containers for snacks and cold items.
Image courtesy of Soft Landing
 Image courtesy of Amazon.com
Image courtesy of Amazon.com

3. Cloth wraps and snack bags: These are great when you do not want to carry around the extra bulk of having every item in a container. They are washable and reusable. You can find them online on etsy.com as well as through market sites like eBay and Amazon. I have seen a few in some stores as well.

Image courtesy of National Eco Wholesale

4. Ceramic: At work I am not allowed to have glass containers (glass is strictly forbidden around pools because of the dangers of bare feet and broken glass) so I bought two ceramic containers that I could bring food to heat up in. The only downside is that if you use them for food storage in the fridge you cannot see what is inside of them (in my house it turns into a stalemate of dares for someone to open it up and see how gross it is inside).

Image courtesy of Apartment Therapy 

5. Vintage Pyrex: you can bake and store in them. However they are not good for traveling because the lids clearly leak and do not stay on well.

Image courtesy of Yahoo Green

Living sustainably on a budget: Packing and storage

As summer is coming to a close my boss decided it was time to clean out our office at the pool. This meant that piles of items were being donated to local organizations and my fellow lifeguards and myself began begging for items. I know they do not seem like much, but I am pleased with the crates I received (after begging and excellent persuasive skills I got four milk/grocery crates).

Why do I think these things are so awesome? Because I can do so many things with them. They are perfect sustainable packing and storage devices. They are easy to pack because they have handles, you can see through them, and they stack easily without bending out of shape or sliding around too much. They are also great once I am moved in because I can stack them together in different shapes to fit various needs. I used two stacked together last year to make a bookshelf/night stand, and this year with so many of us in such a small space I have a feeling they will be incredibly useful.
If you are jealous of my luck, you can score some for free as well. Often grocery stores give them away for free. You can also use recycling bins and other similar shipping containers. Garage sales may also be a good place to find yourself some. If you really really cannot find used ones, many stores sell new crates — however they are creating new plastic to create them and they are often not as strong as the ones intended for shipping.

Project Green Dorm

As students around the country move into their dorm rooms they are faced with what often feels like endless decisions on what they should buy and what they need. Price is often the most important factor in what everyone buys with most people believing the cheaper the better.

Project Green Dorm is an online guide that gives ideas and suggestions for what to buy. Although some of their suggestions can be expensive, the site offers great ideas that can be do-able on any budget. Project Green Dorm gives suggestions for bedroom, bath and body, closet (clothing and organization), active clothing and equipment, E-gadgets, cleaning supplies, study area, break time, and DIY.

Image courtesy of Project Green Dorm

Here are some quick things to remember as you shop and move in:

1. Avoid all objects that are intended to only last a year and then be thrown out.

2. Do everything you can to avoid plastic. Not only does it harm the environment in its creation and disposal, but it also breaks easily and looks tacky. Filling your room with plastic objects can make your room feel more like your storage unit than your home away from home.

3. Dorm rooms are tiny (some make prison cells look spacious). Consider if you really need something or not. I recommend packing all clothing, school supplies, bedding, and other items you know you for sure need, and buying things you are unsure about once you move in. Typically the last minute items for me include needing an extra storage device or container.

4. Bring things to put on your walls. Whether it’s pictures of friends or something that you kept in room at home, filling your white walls with visually interesting items that you enjoy can make a big difference in making your room feel like home instead of prison. I recommend wrapping paper, pictures, posters, fabric, or anything else you can blue tape or tack to the wall (if you do not have a bulletin board in your room you can easily buy the little squares and make your own).

Homemade veggie burgers

As a vegetarian I am often disappointed when I order a veggie burger in restaurants because they serve frozen, name-brand burgers instead of a homemade burger full of fresh veggies and whole grains. With a recent study finding hexane, an air pollutant and neurotoxin, in many popular veggie burgers, it’s even more important to me to know what I’m eating.

These homemade veggie burgers burgers are incredibly easy to make, and they are a satisfying alternative to a meat burger.

Ingredients:

1/2 cup cleaned and grated carrots
1 and 1/2 teaspoons chili powder
1 teaspoon ground cumin (we usually use a little more because my mom loves cumin)
3 cups pinto or kidney beans (two 15 ounce cans, drained, or homemade beans)
2 tablespoons Dijon mustard
2 tablespoons soy sauce
2 tablespoons ketchup or 1 tablespoon tomato paste (I have made it with both and there is little difference in flavor. I usually use whatever I have on hand.)
1 and 1/2 cups rolled oats
salt and pepper to taste
1 egg (optional)
Oil for cooking

1. Mash the beans in a large bowl with a potato masher or the back of a fork.

2. Add in the mustard, soy sauce, ketchup or tomato paste, carrots, and spices.

3. Mix in oats.

4. Add in egg. The egg helps bind these burgers together. Without they egg they work just fine, they just tend to crumble apart a bit more.

5. Form into 6-8 burgers


6. Cook the burgers on medium-low heat for 5-8 minutes on each side. Add just enough olive oil to prevent the burgers from sticking before placing them on the pan. I used two pans to speed things up by making all of them at once. The recipe also says you can bake them at 350 degrees F for about 25 minutes (I have never tried this and the recipe strongly suggests cooking them in a pan on the stove top.)


These flavorful burgers are one of my favorite meals to make at home because of their simplicity and unbeatable taste. Even my meat-eating friends and family enjoy them.

Recipe adapted from Moosewood Restaurant Low-Fat Favorites